Showing posts with label BY STAMP: French Foliage. Show all posts

Again this month the lovely Lisa generously opened her home up for us for class.  This was a special thank you card that I put together for her to let her know how much I appreciate her accommodating us.  The centre panel was originally an autumn inspired ATC that features two of my favourite retired Stampin' Up! sets called Simply Soft and French Foliage.  I've layered it up on matching card stocks and incorporated it in a card layout inspired by the current Freshly Made Sketches card challenge.

Thank you to all the ladies who attended today's class - it was a real pleasure to craft with you all.  And another thank you to Lisa for hosting!  Look forward to doing it all again in our next class session scheduled for December 7th.  For more information about this project or the upcoming class please don't hesitate to contact me.

Simply Soft Thank You

October 26, 2013


Last month I received a special request - to create two large (A4 folded) birthday cards, one for her and one for him!  I love when a customer sets me a creative challenge.  She had seen one of my previous designs incorporating the black and white colour scheme and requested something similar with an additional male card in matching tones.  The below male design incorporates a faux metal embossed background which was heaps of fun to do and I can't wait to try this in class to show my ladies sometime soon!


The birthday bloke loves rock hence the 'rock' crown from the now retired Grunge Rock set.  I've added a layer of crystal effects to the crown to help it stand out. A great way to add a little 'wow' to a fairly fresh and clean design.


If you have a special card you would like to order for an upcoming event please do not hesitate to contact me.


His and Hers Custom Order

June 12, 2013


In honour of Mother's Day which is just around the corner, we created three very floral and feminine cards in class this month.  All three cards feature imagery from the Secret Garden Stamp set currently available in the Stampin' Up! mini catalogue.


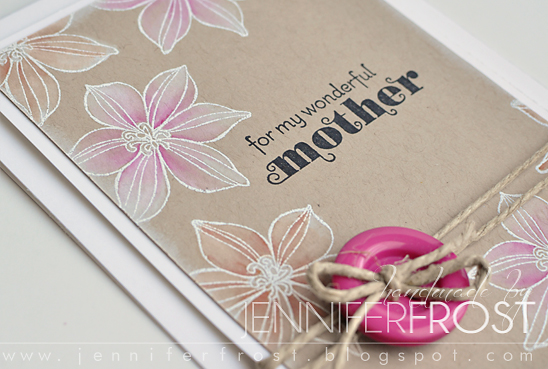
This first card design allowed us to practice our heat embossing with a spray of lovely flowers in white on Crumb Cake card.  We then coloured these flowers with whisper white ink lending a beautiful soft feel to the design.  A pop of colour was layered over the top of the flowers once the white base had dried.


Our second card had a very different, arty feel to it.  We stamped the large outline flower from the Secret Garden set across the whisper white front and added a spritz of colour with the colour spritzer and some Stampin' Write Markers.  The ink splatter stamp from the French Foliage stamp was the perfect way to add some additional colour.  A strip of Floral District DSP, some coral calypso bakers twine and a sentiment layered on the Modern Label punch shape finished the design off nicely.


You may recognise this third design, I originally featured the layout in March as it was initially created in the Pattern Play online class I took.  I've changed the colours so I could feature current DSP from the Floral District paper pack.  Again, class participants were able to practice some more heat embossing, this time with black to create the sentiment on the front of the card.  


If you have any questions about these projects or about future class dates please don't hesitate to contact me.

I am hoping to be able to schedule classes again later this year - hopefully in Spring.  My husband and I are expecting our second baby this June so I will need a little time to adjust to life with our new addition before I can get another class organised.  I will continue to take orders during this little period of 'maternity leave' and I am also open to enquiries for workshops from August onwards.  I know it is ambitious but I would also like to have a new catalogue open house in July sometime if possible - keep an eye on my e-newsletters for more information.  

32 weeks and counting...


In Class - April 2013

May 5, 2013


We are excited to be attending a wedding this afternoon for some friends of ours.  Their wedding invitation was an elegant black and white design so I've created a card in these colours, with a touch of silver, to give to them tonight to wish them every happiness as they start their lives together as husband and wife.

The current Freshly Made Sketch was wonderfully helpful in putting this layout together.

Freshly Made for the Newlyweds

April 13, 2013


This Christmas I put together some little gift bags to give to the lovely ladies who have been so supportive of my classes throughout 2012.


They all received a handmade gift tag and an assortment of cut paper, punched butterflies and scallop circle shapes to incorporate in projects over the summer break - as well as some chocolates to nibble on while they create designs using these challenge pieces.  I look forward to seeing what they make!!


I just love making gift tags and these were especially fun to make!


I've just set the first class dates for 2013.  You can find these on my Stampin' Up! Calender of events at http://www.stampinup.net/esuite/home/jenniferfrost

Christmas Gifts

January 8, 2013

All the cards in our last class for the 2012 featured this year's new Stampin' Up! in-colours.  The first design was this Christmas themed card decorated with the Christmas imagery from the Easy Events Stamp Set.


I have replaced the red from a typical red and green Christmas colour combination with Raspberry Ripple.
The main image has been coloured in a combination of blender pen with Raspberry Ripple ink for the berries and Old Olive Stampin' Write Marker for the leaves.  The berries were finished with a touch of Crystal Effects to give them shine and texture.


I scored some of the matching Stitched Satin ribbon in last month's promotion and thought it was a pretty embellishment to finish this design.

The second card we created was this elegant Summer Starfruit, Black and White design featuring the Snow Swirled Stamp Set.


One of the prominent techniques shown here was how to use the embossing folder with ink to help create a contrasting piece of patterned card stock.

The final card is one that has previously featured on this blog before.  Not only is it the Christmas season but it is also the season for Weddings and so Wedding anniversaries too.  This design which uses the new Midnight Muse in colour in conjunction with soft browns, was created with this in mind.


Class participants created the decorative background piece themselves using hand stamped imagery from the  French Foliage Stamp Set and with some shimmer paint applied with cling wrap.

If you have any questions about these projects or about future class dates please don't hesitate to contact me.

In Class - December 2012

December 17, 2012


I have a workshop next weekend and the request was for an elegant card that featured shimmer paint.  Here the shimmer paint has been applied to the background using some kitchen cling wrap.  I've also added some stamped imagery from the French Foliage set to the background for some added interest.  The main panel features a pretty butterfly from the Papillon Potpouri set layered over a die cut Beautiful Wings Embosslit.  With the special ribbon offer from Stampin' Up! available at the moment I thought I would showcase the Midnight Muse Satin Stitched ribbon from this promotion.  The finishing touch was the little library clip - I love these embellishments.


Layout inspired by the current Connie and Mary Sketch Challenge.

Conmarxmas12top3

Elegant Congratulations

October 21, 2012


In workshops this month I featured heat embossing using this pretty design.  Embossing white on black is such a powerfully effective way of demonstrating the benefits of this technique.  Here I have used imagery from the Elements of Style stamp set with a touch of text from the French Foliage set.  The sentiment is from the Friendly Phrases set.


I wanted to break the black and white up with a splash of colour and have used the new Stampin' Up! Summer Starfruit In Colour.  The back piece of black background has been made shimmery with my own spritz.  For the shimmer spray recipe please follow this link.

If you have any questions about this card or are interested in learning more about hosting a workshop of your own, please don't hesitate to get in touch.

Elements of Style Embossed

September 29, 2012


A sympathy card for a friend who lost a male relative last week.  I chose the neutral Sahara Sand for the base with a panel of Chocolate Chip lightly stamped with woodgrain print in the background.  The French Foliage Stamp Set has lovely gender neutral imagery.  I used the leaves from this set on white gloss and then brayered over Old Olive Green to create the feature panel. I kept embellishments to a minimum with just a button and a little bakers twine to finish.


With Sympathy

August 19, 2012


I'm really enjoying playing with the Attic Boutique Designer Series Papers at the moment.  I haven't done this pretty layered punch flower in a while but I really like the way it works with this particular paper.  Looking forward to sharing this design at this weekend's workshop.

Sketch courtesy of the Paper Players Challenge

Attic Boutique

July 25, 2012

I created this collection of pretty handmade gift tags for a friend as a little thank you for referring a bride and groom looking for wedding stationary to me.  As a result of her referral I have secured my first wedding job and I can't wait to share the designs with you after their big day in October!  


The tags were created in a mix of colours and featured butterflies and/or handmade flowers.   They were a wonderful avenue for using up some of the off-cut pieces of card and designer series paper I have accumulated.  


Layouts inspired by these tags created by the talented Cari Fennell

Gift Tags

July 1, 2012

Today in class we focused on techniques for creating different types of backgrounds, as well as how to create a gorgeous flower embellishment using card stock circles and ideas for incorporating photos into cards.

This is the first design we tackled.  Here the background has been created using a brayer and ink on gloss card stock.  The 'Lollypop' style flower is created using layered die cut circles.
The colour palette - Island Indigo, Baja Breeze and Rich Razzleberry was one suggested by the Stampin' Up! Colour Coach.

The second card we made was previous featured on my blog here and won the 'Cut Above' award at the Paper Players for the week it was entered.  It was a great example in how to create a lovely soft background using stamped imagery.  It also was fun to show how to create this beautiful butterfly using Window Sheets and stayz on ink.

The third project was this gorgeous soft pink vintage inspired design which featured the Framelits Dies currently available in the Autumn-Winter Mini Catalogue.
A couple of my students previously requested I give some ideas on how photos might be incorporated into cards.  So today, for the ladies who were interested, I prepared their beautiful photographs and used these as the centre piece in the frame as opposed to the stamped imagery.  This is how a couple of them came out:

All in all we achieved a lot this morning and had a great time doing so!  I'm very much looking forward to my next classes in June.  Interested in attending?  Please do not hesitate to contact me for information about upcoming dates and how you can get involved at j-frost@live.com.au


In Class - May 19th, 2012

May 19, 2012

Instagram

Blog Archive