Showing posts with label BY PAPER: Floral District. Show all posts

The very clever Tanya Rees, a member of my Stampin' Up! downline, carved her own Tinkerbell stamp using the Stampin' Up! Undefined kit.  So when my son was invited to a fairy themed party, I knew exactly who to go to for the perfect image - lucky me Tan was generous enough to loan me her creation!


As part of our gift to the birthday girl, I put together some invitations for the party.  I printed the base panel and then stamped Tan's Tinkerbell silhouette in perfect plum purple, finishing with a touch of glitter on the edges of the wings.

Of course, I had to make a fairy happy birthday card too!


The background piece of Floral District DSP (now retired) guided my choice of colours for this design. And as such, this time I've stamped the Tinkerbell Silhouette in rich razzleberry.


The 'splatter' in behind the 5 comes from the Gorgeous Grunge set.  The pretty purple rhinestones are regular Stampin' Up! jewels coloured with the new Blendabilities markers.


Inside the card I added a printed Tinkerbell quotation, a side border of Rich Razzleberry cardstock and a scattering of handcut flowers from the same DSP as features on the front of the card.

Considering having a try at hand carving your own stamp?  More information can be found on page 199 of the new 2014/15 catalogue. Heaps of inspiring ideas using this product can be found here: http://www.pinterest.com/stampinup/undefined-stamp-carving/ 


If you have liked what you have seen here please be kind and leave comment.  Thanks for stopping by!

Tinkerbell Undefined

June 14, 2014


Here is a third birthday card I made featuring the Baby, We've Grown set.  These owls are too cute! The little girl I've made this for is an only child and something about the imagery of the little owl between her two parents made me think of her.  

The background paper is from the now retired Floral District designer series paper pack.  I love the colour combination for a little girls card, but the pattern was a bit vibrant for me so I've added a layer of vellum to soften it.  To finish, I've fussy cut some of the flowers from the same paper to dot around the design.

The layout was inspired by the current Retro Sketches challenge.  

I created this sample using one of my January DIY card challenge kits.  I love the Old Olive and Rich Razzleberry colour combination in this piece of Floral District DSP and wanted to come up with a layout that allowed it to dominate.

For more inspirational designs using these papers please visit my facebook page album featuring entries for the January competition.

DIY Card Kit Challenge - January 2014

January 9, 2014


Happy new year!  Who is ready for a new challenge?  You told me you loved the last one so I've thrown together another for you.  Which side will you choose - green or pink?


As before, simply pay $5 and receive all the goodies pictured above.  Then create a card using these items as inspiration.  Not only will you have a pretty project, but if you complete your design and send me a photograph of it before the competition closes, you will also get a chance to win Stampin' Up! gift certificates.  The value of the prizes available will depend on the number of entries.

*Terms and conditions apply.  To take a look at samples made using this kit or to learn more about this challenge please see my Card kit competition facebook page or contact me via email.

All entries will be available to browse on Tuesday 21st January.  I would love for you to stop by my facebook page and vote for your favourite to win then!

$5 Card Kit Challenge

January 5, 2014


We celebrated an owl themed 1st birthday today and I designed this card especially for the birthday girl. The colour pallette was based on the invitation which also happened to be a fabulous match for some retired Floral District dsp that I had on hand. The layout was inspired by the current Freshly Made Sketch challenge.


Have a hoot...

December 1, 2013


In honour of Mother's Day which is just around the corner, we created three very floral and feminine cards in class this month.  All three cards feature imagery from the Secret Garden Stamp set currently available in the Stampin' Up! mini catalogue.


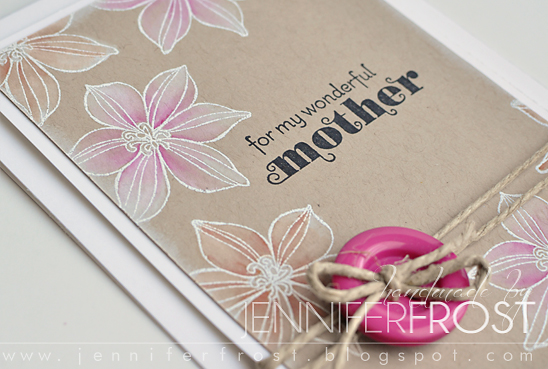
This first card design allowed us to practice our heat embossing with a spray of lovely flowers in white on Crumb Cake card.  We then coloured these flowers with whisper white ink lending a beautiful soft feel to the design.  A pop of colour was layered over the top of the flowers once the white base had dried.


Our second card had a very different, arty feel to it.  We stamped the large outline flower from the Secret Garden set across the whisper white front and added a spritz of colour with the colour spritzer and some Stampin' Write Markers.  The ink splatter stamp from the French Foliage stamp was the perfect way to add some additional colour.  A strip of Floral District DSP, some coral calypso bakers twine and a sentiment layered on the Modern Label punch shape finished the design off nicely.


You may recognise this third design, I originally featured the layout in March as it was initially created in the Pattern Play online class I took.  I've changed the colours so I could feature current DSP from the Floral District paper pack.  Again, class participants were able to practice some more heat embossing, this time with black to create the sentiment on the front of the card.  


If you have any questions about these projects or about future class dates please don't hesitate to contact me.

I am hoping to be able to schedule classes again later this year - hopefully in Spring.  My husband and I are expecting our second baby this June so I will need a little time to adjust to life with our new addition before I can get another class organised.  I will continue to take orders during this little period of 'maternity leave' and I am also open to enquiries for workshops from August onwards.  I know it is ambitious but I would also like to have a new catalogue open house in July sometime if possible - keep an eye on my e-newsletters for more information.  

32 weeks and counting...


In Class - April 2013

May 5, 2013


This month we created four projects inspired by Stampin' Up!'s Floral District papers and colour schemes.
The first design was this pretty card.  The background Baja Breeze blue card stock has been lightly sprayed with shimmer mist for a lovely soft sparkly effect (for instructions on how to create your own shimmer mist see this tutorial).  A butterfly was punched in the decorative panel of Floral District Designer Series Paper using Stampin' Up's new Elegant Butterfly Punch.  This panel was then lifted up on Stampin' Dimensionals over a bordering piece of Rich Razzleberry purple card stock - 'revealing' the purple butterfly through punched shape. Sentiments on banners are really popular right now so I incorporated this little 'happy birthday' from the Teeny Tiny Sentiments set on a handcut double sided banner.


Next we created this large 13.5cm square card featuring a rosette.  While there are now great dies available to help you get the perfect base for a rosette, we created ours from scratch by punching the border of a piece of Rich Razzleberry card stock with the Scalloped Edge Punch and scoring our fold marks with a paper cutter and bone folder using the scalloped edges as a guide for where to put the lines.  These papers were then fan folded and put together using hot glue to hold everything in place.  A white embossed butterfly from the Papillion Potpourri Stamp Set sits on the front of the rosette.  We used the same happy birthday stamp for the sentiment as the previous card, also on banners but this time each word was given it's own banner and then we did a faux stitching look to 'hold' them in place.


When you cut a square card from an A4 piece of card stock you always have a strip left over.  We used this strip to make two different types of gift tag/card.  This first was cut using the Two Tags Die.  A white panel was also cut with the die, stamped with the flower stem from the Summer Silhouettes Stamp set and stuck down to the top.  The little flowers were stamped using the 'baby wipe' technique to achieve the multi coloured effect.  The sentiment here is from the Friendly Phrases Stamp Set.


This little 7.5cm square gift card was made using what remained of the card stock strip after making the above tag.  It features imagery from the same Summer Silhouettes Stamp set with the baby wipe technique being used again to create the pretty multicoloured flower.

If you have any questions about these projects or about future class dates please don't hesitate to contact me.

In Class - October 2012

October 20, 2012

Instagram

Blog Archive