Showing posts with label Gift Box. Show all posts

Hello!  Today, I'm joining the Fancy Friday blog hop as we share projects created especially for family.  This theme was perfect for creating a class around!

When I made this gift bag, it was not my intention to create a full set of projects.  We have been featuring the Gift Bag Punch Board in class these past few months.  I wanted to show class participants how the tool could be used to create an extra large gift bag that would fit their handmade cards in.  Who else loves giving packs of their own handmade cards as gifts?


Once I cut the 12"x 12" designer series patterned paper pieces for this project, I was left with two panels that were perfect for matching cards - and so a set was born!


Each participant enjoyed choosing one piece of 12" x 12" paper to work with and pairing it with whatever sentiment they liked.  Popular choices were Easter, birthday and Mother's Day.

Supplies for the cards 
Stamps: Touches of Texture plus a sentiment, here I've used Itty Bitty Greetings and Best Bunny
Card: Whisper White, Gray Granite
Paper: Neutrals Designer Series Paper (this particular pattern is retired but you could easily substitute with ANY paper that calls to you)
Ink: Granite Gray, Call Me Clover, Grapefruit Grove, Petal Pink, VersaMark
Accessories & Tools:  White embossing powder, Heat Tool, Blender Pen, Basic Black Stampin' Write Marker
Adhesives: Tear'n'Tape, Dimensionals, Multipurpose Glue


Bonus gift box
The class was held in the week before Easter, so it seemed fitting to squeeze in this little bonus Easter gift box.  Another example of a different idea for the Gift Bag Punch Board.


Do you have the Gift Bag Punch Board at home?  Make the most out of this tool and pick up a copy of my tutorial bundle today.  It includes three alternate project ideas and at just $3US it's an absolute steal!


 Includes a 12 page, full-colour PDF with step-by-step photos and instructions in both A4 and Letter format.  Just $3US


LAST CHANCE PRODUCTS

Both the punch board and the beautiful Touches of Texture stamp set featured here are retiring.  Buy yours today before they are gone!  Order through my online store and have your stamping supplies delivered straight to your door, wherever you are, Australia wide. 

Host code for customer rewards: 79W2YYAU


CONTINUE THE HOP!
For more family-friendly project fun, click the 'Next' link below to see what the amazing Connie Collins has for you today!


Love this design? Find more of my projects on
FACEBOOK  |  INSTAGRAM  |  PINTEREST  |  YOUTUBE


TAKE YOUR CRAFTING TO THE NEXT LEVEL

Attend live online classes with four multi-award-winning Stampin' Up! Artisans! Join our Crafty Carrot Co program from anywhere in the world, from the comfort of your own home!  Follow video-based tutorials, be inspired and see behind-the-scenes tips and tricks to bring your cardmaking to the next level, whether you're a beginner or have years of experience there is something for you! 


Find more information, and subscribe to join us today at http://craftycarrotcollective.blogspot.com.au/


For Family, Fancy Friday Blog Hop

April 26, 2019


Today, I'm joining the Fancy Friday blog hop for a CASE the Catalogue Challenge!  In class earlier this month, I featured this little faceted gift box made using the Gift Bag Punch Board. 
I first saw this interesting project when Jessica Winter created it for the Stampin' Up! Corporate blog a few years ago.  Upon searching, I sadly couldn't find her original post. So I investigated further and found that Julie Dimatteo had a video tutorial - brilliant, thanks Julie! 
Once I had the box base, I 
drew inspiration from a pretty package, found on page 19 of the Annual Catalogue, for the final decorative touches.
  
I choose the Share What You Love Speciality Designer Series papers for my lids.  These papers have a great weight for 3D projects and their pretty patterns with their shimmery detail are perfect for layering a few embellishments on.
The sentiment comes from the Itty Bitty Sentiments set.  I like the generic 'For You' as you could use these for any occasion.  I think mine will be gifted this Easter with a few tiny treats inside!

These boxes made for a SUPER FUN class project!  Whilst Julie's video was awesome for helping me put the class sample together, I found a step-by-step instructional worksheet was best for walking my class group through the project on the day.  Let me tell you, everyone was in awe of this unique use for the Gift Bag Punch board and raved about how they look forward to making their own boxes at home!  

STEP-BY-STEP FACETED GIFT BOX TUTORIAL
Your class participants are sure to go crazy for this special gift bag punch board project too!  Simply pick up a copy of this Gift Bag Punch Board tutorial bundle, print at home and you are ready to go!

The bundle includes detailed instructions for this faceted gift box, but also for an XL gift bag (perfect for putting your handmade cards in!) and a small rectangle treat box too.

Includes 13 page, full colour PDF with step-by-step photos and instructions in both A4 and Letter format.  
Just $3 US


CONTINUE THE HOP!
For more CASE the Catalogue project ideas, click the 'Next' link below to see what my talented friend Elizabeth Price has for you today!


Love this design? Find more of my projects on
FACEBOOK  |  INSTAGRAM  |  PINTEREST  |  YOUTUBE


STEP UP YOUR CRAFTING GAME

With it's pretty, bright colour scheme and delicate laser-cut overlays, The Crafty Carrot Co knew it would be so fun to teach you how to use all the Incredible Like You precut elements to develop new skills, step up your crafting game and create your own unique cards and memory keeping projects.

It's not too late to join us this April!  Reserve your spot in this exclusive class series today: http://craftycarrotcollective.blogspot.com/


Diamond Shaped Gift Box, Fancy Friday Blog Hop

March 29, 2019


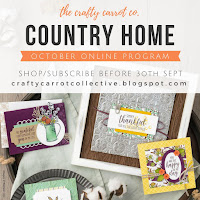
The Artisan Design Team is here with our official Stampin' Up! October blog hop! We are featuring the Country Lane Suite from the newly released holiday catalogue (that's page 43 for those playing along at home).  I've combined these with the Bakers Boxes, also in the holiday catalogue.  You must check these out if you haven't already!  So great for gift giving.


The farmhouse decorating trend is so in right now, wherever you live!  We are renovating our home at the moment and are just loving adding touches of country comfort into each space.  It's so nice to see Stampin' Up! choose to incorporate the trend in this gorgeous product suite.  This Tin Tile Embossing Folder is to die for! I used an aqua painter to brush over a little copper shimmer paint for the shiny metallic finish.


Our Stampin' Blend markers are perfect for colouring these florals.  I couldn't resist playing around with a few colour combinations - do you have one you like best?


Do you love this product suite and want more inspiration?  Click 'next' to continue the blog hop below and see what the lovely Jessica Winter has made.


Supplies Used
Stamps: Country Home
Card: Whisper White, Cajun Craze, Crumb Cake
Ink: Memento Black, Rich Razzleberry, Petal Pink, Pool Party
Accessories & Tools: Assorted Stampin Blends, Braided Linen Trim, Tin Tile Textured Impressions Embossing Folder, Copper Shimmer Paint, Aqua Painter, Bakers Boxes
Adhesives: SNAIL or double sided tape, Stampin' Dimensionals


WANT MORE COUNTRY HOME IDEAS?  IT'S NOT TOO LATE!

Attend live online classes with at least four multi-award-winning Stampin' Up! Artisans! Join our Crafty Carrot Co program from anywhere in the world, from the comfort of your own home!  Follow video-based tutorials, be inspired and see behind-the-scenes tips and tricks to bring your cardmaking to the next level, whether you're a beginner or have years of experience there is something for you! 

Find more information, and subscribe to join us today at http://craftycarrotcollective.blogspot.com.au/


Country Home, Stampin' Up! Artisan Design Team Blog Hop

October 19, 2018


Our supermarket shelves are packed full of chocolately Easter temptation.  With the holiday just a month away, it's a great time for us crafty types to start putting some handmade gift plans together!

Today, the Let's Get Hopping team have some adorable and delicious inspiration to help you do just that.  

With all I've learned about food these past few years, I feel super uncomfortable thinking about what actually lurks inside all those foil-wrapped eggs on the supermarket shelves.  For this reason, I'm sharing a refined sugar-free chocolate treat for my project today.  These totally addictive Nut-Free Cacao & Coconut Bliss Balls use healthier unprocessed ingredients, are super easy to put together and taste amazing!

T R E A T   R E C I P E 

Process 1.5 cups (145g) rolled oats, 3 tbs cacao powder, 12 pitted fresh dates (I used medjool), 1.5 cups (120g) desiccated coconut and 2 tbs rice malt syrup in a food processor until almost smooth and well combined.  Add a tsp or two of water at a time if not quite wet enough.  Place 3 tbs desiccated coconut on a plate.  Roll 1 tbs portions of mixture into balls.  You should get about 30 balls (if you don't eat too much of the mix as you are rolling lol...)  Roll in coconut to evenly coat.  Place in a lined tray in the fridge for 1 hour or until set.  Store in an airtight container in the fridge for up to 2 weeks.


I've also upcycled a small plastic berry container for the gift box.  As I shared last month when I published *THIS* set of gift cards, buying single-use plastic packaging makes me feel terrible!  Repurposing the containers for gifts such as these gives an otherwise wasted piece of perfectly good packaging new life!

T A G   R E C I P E
I stamped the pretty flower from the Petal Palette stamp set in black ink.  Then masked it and applied a soft halo of inks using an aqua painter.  I removed the mask and coloured my flower with watercolour pencils and blended with the aqua painter again.  The sentiment comes from the ever versatile Teeny Tiny Sentiments set.

I hope that you've enjoyed this Easter treat idea!  Be sure to click the next button below to see what delicious inspiration my friend Carolynn has for you.


Love the Petal Palette imagery used in this project?  So do the Crafty Carrot Co crew!  It will be the feature of our exclusive class series throughout April.  Be sure to pop back later this month to see what inspiration we have to share with you for this pretty set!  


CRAFTY CARROT CO, APRIL ONLINE CLASS SERIES

The Crafty Carrot Co team are passionate about papercrafts and can't wait to share our love with you, wherever you are in the world!  That's why we come together every month and teach live video-based classes for card makers of every level, whether you're a beginner or have years of experience!  

Find more information, and subscribe to join us today at http://craftycarrotcollective.blogspot.com.au/

Easter Treats, Let's Get Hopping #7

March 1, 2018


In November, I had the most amazing adventure overseas where I got to meet, laugh and craft with some of my favorite Stampin' Up! friends from around the world.  I wanted to make a small gift for the ladies, something handcrafted that had an Australian flavour to it. 

To create the package I modified the measurements of my lidded gift box (see tutorial *HERE*) to create a smaller box.  I stamped the label detail and words from the Labels to Love stamp set.  The background gum nut image is an old stamp I picked up a long time ago and I've no idea of the brand but I just loved the Australian bush feel of it. 


Inside I included a Caramello Koala, a fun sized Cherry Ripe and a sample of Vegemite (not pictured - we used up the last one on toast before I took my photos lol...)!

In the spirit of Australia Day, I'm sharing a little video from my kitchen today.  Cheese and Vegemite Scrolls are a favourite lunchbox snack here and I'd love if you gave this simple recipe a try for a little taste of Australia!  


Supplies Used:
Stamps: Labels to Love
Inks: VersaMark, Garden Green
Papers: Whisper White, Sahara Sand, Early Espresso
Accessories/Tools: White Embossing Powder, Everyday Label Punch, Classic Label Punch, Burlap Ribbon, White Bakers Twine.


Exclusive Stampin' Up! Cardstock sale for my Australian friends!  Contact me before 5pm Tuesday 30th Jan and I'll give you 20% off all cardstock ordered. 


Happy Australia Day

January 26, 2018

Labels to Love, Customer Rewards Program, Video Tutorial, Gift Box, Stampin' Up!, The Crafty Carrot Collective, Year of Cheer Specialty Designer Series Paper, Flourishing Thinlets, Papercraft by Jennifer Frost

Welcome to this month's Crafty Carrot Co blog hop where we tease you with pretty projects featuring the Labels To Love stamp set, our product focus for the October interactive rewards program.

Today I'm sharing this lidded box.  It's one of my favourite gift packaging choices!  It's so quick and easy to put together!  But don't take my word for it, see for yourself in this video tutorial right *HERE*.


The box lid is made from the gorgeous Year of Cheer foil specialty paper. This paper needs no embellishing - it is just stunning all of its own.  To allow the pattern to really shine, I kept my gift tag very simple and clean with tones of black, white and silver.  With the exception of the touch of blushing bride in the leaves - this soft pink and copper is a very trendy combination!

EXCITING NEWS!!


We want to help as many people as possible get into the festive spirit!  So we have decided to share the love with customers, fellow demonstrators and the crafting public alike throughout October with a brand new subscription offer!

You can now SUBSCRIBE to join the live online program for just $19AUD.  Click *HERE* to register now!

Of course, our customers still receive FREE access with their September purchases!  Place a Stampin' up! order with us anytime this month to get free access to this fun interactive online class. Fellow Aussies can find my online store *HERE*. The exclusive host code to qualify is FR9DV2AG.

Not in Australia? Find your Crafty Carrot Co. demonstrator *HERE* or simply follow the blog hop to your region!  Next up is the talented Canadian representative, Krista Frattin!


Supplies Used:
Stamps: Labels to Love
Inks: Basic Black, VersaMark
Papers: Whisper White, Year of Cheer Specialty Designer Series Paper, Basic Black, Blushing Bride
Accessories/Tools: Silver thread


[VIDEO] Labels to Love Lidded Gift Box

September 14, 2017

Blog Archive