Thin patterned paper strips are often the scraps we keep “just in case”, but they can feel tricky to turn into something that actually looks intentional.
In this project, I’m sharing how I used a simple colour challenge and a stash of scrap papers to turn those thin strips into a finished card front that feels clean, layered, and polished.

Starting Point: A Colour Challenge and a Scrap Pile

This card began with the AAA Cards Challenge, which provided a colour palette to work with. I dug through my scrap stash and drew coordinating paper scraps, cutting them into thin strips ready for building the design. 

Why Thin Strips Can Be Tricky in Card Making

Thin strips of patterned paper can easily look messy if they’re not balanced well. The AAA Cards Challenge is all about Clean and Simple designs so my goals for this layout were to:

  • Make the design feel intentional rather than random
  • Prevent colours and patterns from blending together
  • Keep alignment clean and visually structured

To solve this, I used a simple layering trick that instantly lifts the design.

The Simple Layering Trick That Changes Everything

Instead of placing patterned strips directly onto the card base, I added a narrow strip of white cardstock behind each one. This small change separates each colour and pattern, adds visual breathing space and makes the whole layout feel more polished.

Stepping Up the Design with Die-Cut Flowers

Once the base card was assembled, I chose to add an extra layer of detail using tiny die-cut flowers cut from both white and matching coloured scrap pieces. This combination created a soft floral spray that ties the whole colour palette together, while still keeps the overall clean and simple feel.

Watch the Video Tutorial

If you’d like to see exactly how this came together, you can watch the full video here:

Clean and Simple vs Stepped-Up Version

I also created a simpler version of this design using leftover pieces from my desk. This version skips some of the layering and keeps things more minimal, using just the essential elements. Both approaches work well:

  • Clean and simple version – quick, minimal, and easy to recreate
  • Stepped-up version – more layered, textured, and detailed

This shows how one basic layout can be adapted depending on how much time or detail you want to add.

Using a Repeatable Layout (From My Scrap Guide)

The layout used in this card comes from my printable companion guide, which was developed during my earlier scrap-focused card series. Once you have a structure like this, it becomes much easier to adapt colours, themes, and challenges without starting from scratch each time.


I’m playing along with this week's Sunday Stamps colour challenge and couldn’t resist pulling together some scraps to see what I could create.

Cardmaking Inspiration from Colour Challenges

In the Sunday Stamps palette, the colours sit separated by white space, which inspired me to add thin white strips between each of the patterned papers.

I love how that small detail helps each colour stand out and changes the overall feel of the card.

Step It Up with Die-Cut Floral Details

The PaperFunday April Challenge is "anything goes" with optional die cut twist, so I was inspired to add a soft spray of die-cut flowers across the design. 

I also swapped out the faux stitched detail I used in the past (see here) for a touch of twine instead. It adds a lovely touch of texture without overwhelming the card.

I really love how this one came together. It still feels “scrappy,” but a little more refined and intentional.

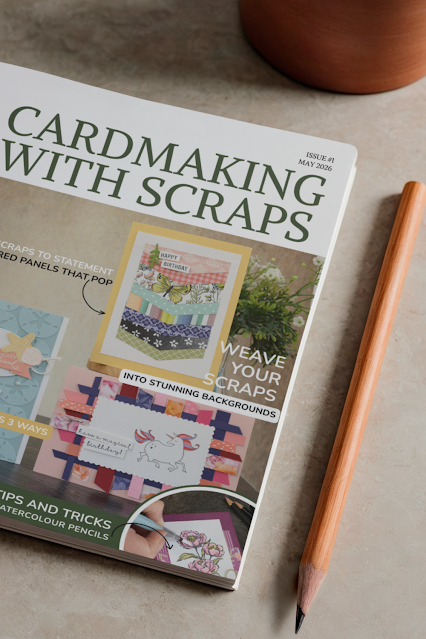
Cardmaking with Scraps: A Simple Creative Approach

This is one of the ways I’ve been exploring how to turn simple scraps into finished designs using a few repeatable ideas. There’s something really enjoyable about working within those kinds of gentle constraints and seeing how different each result can be.

If you enjoy working with your scraps like this, I’ve put together a printable guide with similar creative challenges you can explore in your own stash. 

Want More Scrap Card Ideas?

I’ll also be sharing another variation of this idea using a different colour palette over on YouTube later this week, so I’m curious to see how that one compares.

Turning Thin Scraps into a Striking Card

April 29, 2026

Today I’m sharing a vintage-inspired layered card, created entirely from paper scraps and elements I had on hand.

Stamping your own DIY Vintage Background

I started with a card-front sized scrap of patterned paper from my stash—the very last piece I had from an older set—which already had a soft, slightly distressed feel. From there, I built it up with additional stamping using black ink and some stamping-off techniques to create more depth and variation. The postmark details add that nostalgic, stationery-inspired feel.

No Line Watercolouring

One of my favourite parts of this card is the floral feature. Originally, I planned to stamp it in black, but I ended up using a no-line watercolouring technique instead, and I’m so glad I did. It was a bit of a happy accident that turned into something really soft and delicate, and it ties beautifully into the overall vintage look.

Scrap Layer Embellishments

I created a scrappy, notepaper-style layer in the background using a vanilla cardstock offcut. I paired this with patterned paper scraps from my desk to add a little colour and interest, while the vellum leaves add a soft, subtle detail. There’s something really rewarding about turning leftover scraps into something that feels intentional and cohesive.

Watch the Video Tutorial

I’ll be sharing a full video of this process on Friday, where I walk through the background building, layering, and watercolouring techniques in more detail. In that video, I’ll also be recreating this vintage-style background from scratch, so you can achieve a similar look even without the original base paper.

World Stationary Day

This card was inspired by the Festive Friday Challenge Blog #FF0207, celebrating World Stationery Day.

From their inspiration list, I incorporated sepia tones, twine, distressing, vellum, postmarks, and a “thinking of you” sentiment.

Thanks so much for stopping by—and if you’re playing along with the challenge, I’d love to see what you create!


Vintage Inspired Layered Card

April 21, 2026

If you’re anything like me, you probably have a pile of paper scraps sitting on your desk… and somehow, no matter how many projects you make, it never seems to get any smaller.

In fact, mine might actually be getting bigger 😬

As part of my Use Your Stash Paper Scraps Edition, I’ve been challenging myself to work through that pile—and for this challenge, I wanted to focus on something I usually avoid:

big, bold patterned paper.

Why Bold Patterns Feel So Hard to Use

You know the ones—bright, busy, full of colour and detail.

They’re beautiful… but when it comes time to make a card, they can feel overwhelming.

And if you’re like me, it’s very tempting to flip them over and use the subtle side instead. It feels easier, safer, and more predictable.

But those bold patterns are just too lovely not to be used.

A Simple Way to Make Bold Patterns Work

For this challenge, I used a simple sketch to help break up those larger patterns into smaller sections. That one change made such a difference. Instead of competing for attention, the patterns started to feel balanced and intentional, and much easier to work with.

It also meant I could mix multiple bold scraps together without the card feeling “too much.”

Watch the Full Process

If you’d like to see exactly how this came together, you can watch the full video here:


In the video, I walk through:

  • how I chose my patterned paper scraps
  • how I used the sketch to guide the layout
  • and how I created multiple cards using the same idea

A Few Things That Helped Me

If you’re wanting to try this yourself, here are a few simple tips:

  • Break bold patterns into smaller pieces
  • Let one pattern be the “feature” and support it with others
  • Stick to a loose colour palette to keep things cohesive
  • Keep going even if it feels like “too much” at first—it often comes together

I’d Love to Hear From You

Do you tend to use bold patterned paper… or avoid it?

And how do you store your scraps—neatly organised, or a little bit chaotic?

I’d love to know what works for you (and what doesn’t!).

Want More Scrap Card Ideas?

I’m putting together a companion guide for this series with sketches, ideas, and ways to use your paper scraps more confidently.

If you’d like:

  • a free bonus scrap busting video
  • and to be the first to know when the guide is released

you can sign up here:

I’ve really enjoyed this challenge—and I have a feeling I might not be done with these scraps just yet.

If you’ve got a scrap pile like mine, this playlist will be right up your alley…


From “Too Bold” to Beautiful Cards | Use Your Stash #8

April 17, 2026

Looking for ideas to use your paper scraps? This cardmaking challenge shows you how to turn leftover patterned paper into a feature design.

This challenge is all about bringing your scraps to the front of your card, instead of tucking them away in the background.

Today’s idea was inspired by a project by Hélène den Breejen, and I’ve taken that concept and explored a few different variations you can try using whatever you already have on your desk.

The Idea: Feature Your Scraps

Instead of treating patterned paper as a supporting element, this technique lets it become the main feature. 

When choosing papers, I like to start with one multicoloured focal pattern—in this case, the floral succulents—and then build around it with tone-on-tone or quieter single-colour patterns to complement it.

I began by layering torn strips of patterned paper to create a soft, textured panel across the front of the card. The imperfect edges give it a relaxed, slightly organic feel.

Clean Cut Variation: Banner Ends

If the torn look isn’t quite your style, this is a cleaner alternative.

Instead of tearing, I:

  • trimmed each strip into a pointed banner end
  • used a simple template to keep them consistent
  • layered them in the same way as the torn version

This keeps the same layout, but gives a more structured, polished finish.

🎥 Watch the Full Process

Torn vs Banner style? You can see these variations come together in the video below, including a few small decisions and changes along the way (some planned… some not!).


A Small Creative Decision

One of those finishing touches is choosing the background colour.

I was deciding between a soft pink and a light yellow—both worked beautifully. In the end, I chose the yellow because it added a little more brightness and helped lift the other colours in the design.

I’d love to know—which would you have chosen?

BONUS: Stepped-Up Experiment

This challenge inspired an additional variation that builds on the same idea in a slightly different way.

If you’d like to see this bonus project, I’m sharing it with my email subscribers:

Keep It Going

If you’re working through your paper scraps, this is such a versatile layout to come back to. You can:

  • change the edge style (torn vs clean)
  • play with colour combinations
  • keep it simple or add extra detail

It’s a great reminder that even the smallest pieces can become something really special.

See you in Challenge 8!


Scrap Feature Two Ways | Use Your Stash #7

April 10, 2026

Paper weaving is a creative way to use paper scraps and turn them into textured card backgrounds. In this tutorial, I’m sharing how to create a woven paper design using leftover cardstock and patterned paper, along with two handmade card ideas using this technique.

paper weaving card made with scrap patterned paper and cardstock strip

Finding Inspiration for Paper Weaving

For this next challenge in my Use Your Stash – Paper Scraps Edition, I found myself revisiting a technique I’d played with years ago.

Back in early 2021, I shared a project with The Crafty Carrot Co where I wove uniform strips of soft blues, pinks, and white to create a simple, textured background. It was neat, controlled, and very much within my comfort zone.

paper weaving card made with scrap patterned paper and cardstock strip

Recently, while flipping through an old Stampin’ Up! magazine, I came across a woven sample that felt completely different — brighter, busier, and far more playful. The strips varied in size, the colours were bold and mixed, and the overall look felt like the perfect fit for a scraps challenge.

I’ll admit, I wasn’t entirely sure I could pull it off.

So before filming, I had a quiet play.

paper weaving card made with scrap patterned paper and cardstock strip

Choosing Colours from Your Scraps

I started with a single multi-coloured floral paper — filled with pinks, peaches, and soft oranges — and pulled in coordinating tone-on-tone patterns and cardstock scraps. I even added a deeper Concord Crush purple for contrast. Using the same approach I’ve leaned on throughout this series, I let that one piece guide the rest of my colour choices.

And to my surprise… I loved how it came together!

Designing Around a Busy Background

For the card design, I chose a scalloped rectangle from the Stitched So Sweetly dies to create a central panel. This allowed the woven background to frame the design without overwhelming it — adding texture and interest while still letting the focal point shine.

I reached for a unicorn stamp I hadn’t used before, which felt like a perfect nod to the “use your stash” theme. Keeping the colouring soft and minimal — mostly white, with subtle touches of colour in the mane and tail — helped balance the busier background beautifully.

Paper Weaving Card Variations

In the video tutorial, I share the full weaving process along with a second variation. While the colours, image, and orientation change, the formula stays the same: one multi-coloured paper to guide your palette, supported by coordinating scraps, and a lightly coloured focal image to bring it all together.

paper weaving card made with scrap patterned paper and cardstock strip

This time, I used a playful chicken from the Hey Birthday Chick stamp set — proof that this technique can be adapted to suit any style.

paper weaving card made with scrap patterned paper and cardstock strip

Watch the Full Tutorial

If you’d like to see the full process and how each version came together, you can watch the tutorial below.


Explore more scrap cardmaking ideas

If you enjoy stash-busting ideas like this, you can explore the rest of the Use Your Stash – Paper Scraps Edition series [here].

Make Woven Paper Backgrounds with Scraps | Use Your Stash #6

April 2, 2026

Creating DIY Patterned Paper from Scraps

In searching for ideas for my Use Your Stash – Paper Scraps Challenge, I went back to an old cardmaking tutorial that focused on working with patterned paper. The featured project used a beautiful multi-coloured paper that moved through a range of warm and cool tones. I realised I didn’t have anything quite like it in my stash, so I decided to see if I could create my own DIY patterned paper using scrap pieces.

For this challenge, I focused the video on creating the patterned paper itself, playing with colour, scraps, and seeing how the panel came together.

Watch the Full Tutorial

You can watch the full process here if you’d like to follow along:


Turning One Panel into Three Cards

Once I had my DIY patterned paper, I reached for my rectangle dies and created three panels from the sheet with just two cuts. 

I used these to create three different cards. It turned out to be a happy accident that each section of the paper contained a different mix of colours, which meant every card ended up with its own personality.

Card One - Freshly Made Sketches

The first card was inspired by Freshly Made Sketches #727, and it worked perfectly with the large outer frame piece from my patterned panel.

This section of the paper was the brightest of the three, as it was the only piece that captured the full sweep of colours, including the bold Melon Mambo pink along the top. When I saw the arch element in the sketch, I immediately thought of a rainbow.

Using the Brilliant Rainbow dies, I created a rainbow in tones pulled from the papers used in the frame. A piece of Bermuda Bay ombré patterned paper in the centre became the backdrop for the rainbow — patterned, but subtle enough that it didn’t compete with the busy, multicoloured frame.

Card Two - TGIF Challenges #568

For this card, I used the second-largest piece of my patterned paper, trimming the smaller rectangle to match the sketch layout. I layered it on a navy card base, loving how the dark tone made the colours in the patterned panel really pop.

I struggled a bit to choose a focal element, but inspired by the die-cut rainbow from Card One, I decided to skip stamping altogether and build the floral focal image using the Flourish Thinlits. I leaned into Melon Mambo and Calypso Coral for the flowers. At first, I worried it might be too loud, but in the end, I think the bold, bright blooms complement the colourful background beautifully.

Card Three - Sunday Stamps

The final rectangle panel had the gentlest tones and felt the most in my comfort zone. I was inspired by the “Whispers of Spring” Sunday Stamps challenge #381, which featured peach, Crumb Cake, soft and deep blues — and a gorgeous flower.

For this card, I used a stamp this time, choosing my new Gallery Blooms floral, stamped simply in Blush on white and layered over the rectangle panel. I added touches of Pool Party die-cut leaves in the background to tie the colours together. I even found a small offcut of Blush ribbon to layer under the sentiment, which worked perfectly with the romantic, soft, feminine vibe of the card.

How One Design Creates Multiple Card Ideas

Each of these three cards grew from the same piece of patterned paper, yet they each ended up with their own personality — bold and bright, layered and playful, or soft and romantic. It’s a reminder of how a single creative experiment can inspire multiple designs, and how working with what you already have can lead to unexpected results.

More Cardmaking Ideas Using Scraps

If you’d like to follow along with the rest of the series, you can find the full Use Your Stash – Paper Scraps Challenge playlist HERE


DIY Patterned Paper | Use Your Stash #5

March 26, 2026

Creating Textured Backgrounds with Scrap Strips

For this challenge I was inspired by a project I’d seen in a catalogue that used three wide strips of patterned paper across the background to add both colour and texture. The sample used tone-on-tone papers with a softly watercoloured potted plant as the focal point.

Using Patterned Paper as a Background Element

I loved the idea of using patterned paper as a textured background element, so I decided to test the concept using pieces from my scrap stash.

A Simple Trick for Short Scrap Pieces

Of course, when you're working with scraps, the pieces you have aren’t always the right size. As I began laying out my background strips, I realised several of the papers I wanted to use were just a little too short.

That led to a small discovery.

Making Scraps Look Like Full-Length Panels

By trimming the strips strategically and positioning them so the ends disappeared behind the focal panel, I was able to create the illusion of longer pieces of patterned paper. It’s a simple trick, but it makes those awkward scraps much more usable.

Adding Colour with Watercolour Pencils

When it came time to film the video for this challenge, I decided to experiment with a variation of the idea. I reached for some purple-toned papers from my scrap pile after noticing I had a watercolour pencil in a similar shade that I hadn’t used much before.

One of the patterned papers included a beautiful multi-coloured floral design, which became the starting point for the colour palette. I pulled several of those colours into the focal image, building up the petals in soft layers using watercolour pencils. The gradual layering created a gentle depth that paired beautifully with the textured background.

Watch the Full Tutorial

Want to see the full process?

In the video for Use Your Stash – Challenge #4, I share the full process for:

• turning scrap strips into a textured background

• the simple trick for making short scraps look like longer panels

• layering colour with watercolour pencils to build a soft floral focal point

A Second Card Variation

Below is the pink variation I mentioned in the video. 

Creative Adjustments and Finishing Touches

The blue circle I shared that I had originally planned to use for the sentiment didn’t quite work the way I’d hoped, but it led to a happy little adjustment. I cut out the word “friend” and paired it with the “hello” in black on white that I had set aside from the purple version, creating a fun multi-coloured sentiment that worked beautifully with the brighter palette.

More Cardmaking Ideas Using Scraps

Next week’s challenge features the DIY patterned paper made from scraps that I experimented with earlier this week. It turned into a really fun way to use those tiny leftover pieces — you can catch the preview HERE. 

Textured Backgrounds from Scrap Strips | Use Your Stash #4

March 20, 2026

Using Leftover Die Cuts for Cardmaking

When I spread my scrap stash out over my desk, I noticed I’d accumulated small piles of leftover die-cut shapes. You cut a few extra “just in case,” set them aside for later… and before long there’s a little stack of shapes that never quite made it onto a finished project.

Creating a Repeated Die-Cut Background

For the third challenge in my Use Your Stash – Season 1: Paper Scraps Edition, I decided to focus on some of these pieces. Instead of treating those leftover shapes as scraps, I turned them into a repeated die-cut background.

Adding Texture with Embossing

I reached for a group of blue circles that had already been cut and placed them inside the Tin Tile embossing folder, running them through the Big Shot to give them this lovely pattern.

I suspect the particular shade of blue was actually from a recycled manila folder rather than a Stampin’ Up! colour, so I couldn’t do an exact match with the background panel I adhered them to. After testing a few blues from my collection as substitutes, I settled on Pacific Point.

Keeping the Design Simple with Bold Colours

Because the colour was quite bold — and I had a sympathy theme in mind — I decided to keep the overall design simple.

A Sea-Inspired Card Variation

When I sat down to film the tutorial, I decided to explore a sea-inspired variation. The blues already lent themselves beautifully to an ocean palette.

I kept the same layout and colours, but switched the embossing folder to Swirls and Curls. The white leafy element became a die-cut net from the Under the Sea framelits, and the orange florals were replaced with a tiny school of fish.

Those small changes shifted the mood of the card, turning the repeated shapes into something a little more playful and thematic.

Watch the Full Tutorial

You can see the design choices and craft along with me in the full video tutorial below.

Exploring a Third Variation with Dies

While filming this challenge, another idea emerged.

I still had the Under the Sea framelits on my desk, and a sand dollar shape caught my eye. With a stack of light blue leftover circles sitting in front of me, it felt like the perfect opportunity to create one more variation.

Creating a Beach-Inspired Card Design

For this version I used the Sand Dollar die to cut the shapes and leaned into a beach-inspired theme.

The lighter palette and delicate shapes gave the card a completely different feeling, even though the underlying idea remained the same. Because the repeated background already added plenty of visual interest, I kept the sentiment banner simple with a few stamped details.

It’s a good reminder that a single layout can evolve in very different directions depending on the supplies you choose.

How One Layout Creates Multiple Card Ideas

Starting with a simple goal — use up die-cut circles — led to three very different cards: a soft sympathy design and two sea-inspired variations.

Using your stash well isn’t just about finishing leftover pieces. It’s about looking at what you already have and asking:What design could this become?

More Cardmaking Ideas Using Scraps

If you’d like to see the full process and how each version came together, you can watch the tutorial below.

If you enjoy stash-busting ideas like this, you can find the other projects in the Use Your Stash – Paper Scraps Edition series HERE.

Leftover Die Cuts | Use Your Stash #3

March 13, 2026

Blog Archive