Showing posts with label BY STAMP: Picture Perfect Birthday. Show all posts

Last year I was so honored to serve on the official Stampin' Up! Artisan Design Team.  The team really connected throughout the year and we wanted to reunite to hop together again. So it's with great pleasure that I welcome you to our little reunion party!  I hope that you have a wonderful time and pick up some fun tips and project ideas!


This design I have for you is an over-the-top, mixed metallics, technique filled project!  I made this card at the special request of one of my class friends.  She'd seen a sample on page 48 of the Occasions catalogue and wanted to make something like it.  I took on the challenge and created this variation.  I have a detailed video tutorial for all of you, you can find it on *YouTube HERE*!  I'd love for you to join me, craft alongside and let me know what you think!


I always LOVE when I get a special request to see a technique or design in action as it helps stretch and guide me creatively.  Is there anything you might like to learn more about?  Let me know!

Thank you so much for coming to our reunion!  My friend, Elizabeth Price, is next up in the blog hop.  Click the next link below to see what beautiful project she has to share today!

No photo description available.


Love this project?  Find more of my work here: 
FACEBOOK  |  INSTAGRAM  |  PINTEREST  |  YOUTUBE

Supplies:
Stamps: Picture Perfect Birthday
Card: Grapefruit Grove, Poppy Parade, Whisper White, Shimmery White
Ink: Smoky Slate, Grapefruit Grove, Poppy Parade, VersaMark
Paper: Silver Foil
Accessories & Tools:  Everyday Label Punch, Eclectic Layers Thinlet Dies, Sponge, Spritzer, Copper Embossing Powder, Powder Brush, Copper Thread, Pearls, Stampin' Blends in Pineapple Punch, Big Shot, Stitched Rectangle Framelit Dies, Silver Edged White Ribbon, Copper Twine.
Adhesives: SNAIL or double-sided tape, Stampin' Dimensionals, Tear'n'Tape
Incredible Like You Online Classes April 2019 - The Crafty Carrot Co.

TAKE YOUR CRAFTING TO THE NEXT LEVEL
With it's pretty, bright colour scheme and delicate laser-cut overlays, The Crafty Carrot Co knew it would be so fun to teach you how to use all the Incredible Like You precut elements to develop new skills, step up your crafting game and create your own unique cards and memory keeping projects.


Step by Step
Unsure? View the detailed video tutorial on *YouTube HERE*!
  1. Sponge Grapefruit on Shimmery White 149 x 67mm.  Add a light spritz of water and set aside to dry.  
  2. While drying, prepare sentiment.  Use the side of the ink pad to ink just the top of sentiment in Smoky Slate. Add some Grapefruit ink with a sponge dauber, and then finish with some Poppy Parade ink also applied with sponge dauber.  Huff and puff over the stamp to ensure it is moist and stamp on white.  Cut with stitched rectangle die. 
  3. Once shimmery white panel is dry, apply some VersaMark by swiping the pad over the panel once or twice. Add Copper embossing powder.  Use brush to get the effect you would like and heat set.  Cut diamonds randomly to complete.  Border on silver foil 149 x 70mm.  Attach to centre of folded grapefruit card front.
  4. To finish, layer sentiment on dimensionals over label shape in Poppy, strips of ribbon and loops of twine.

Eclectic Mixed Metallics, A-Team Reunited Blog Hop

March 22, 2019


Today the Let's Get Hopping crew are sharing cards of all different shapes and sizes!

There are some occasions that call for an extra special project - something a bit different than our usual A6 card design.  Milestone Birthdays definitely fall in this category!  This week my beautiful Mum celebrates her 60th birthday and so I made this double z-fold card just for her.

A big thank you to Natalie from Stamp Witch Blog.  I was grateful for her template.  I adjusted the size to make my square a bit bigger than Natalie's original design, but having her template to work off made the whole process so simple!


The colour scheme was inspired by my friend Cindy Schuster.  I found a piece of gorgeous retired Watercolor Wonder designer series patterned paper in my stash.  Its soft florals are a close match to the pretty Petal Pink, which I found to be a great tone-on-tone tie in with the Cajun in this palette.


Thank you for stopping by to check out my card today!  Click the 'next' link below to see what unusual sized card my crafty friend Teresa has to share today!

Supplies Used (*denotes retired item)
Stamps: Number of Years*, Picture Perfect Birthday
Card: Whisper White, Petal Pink, So Saffron, Gray Granite
Paper: Watercolor Wonder Designer Series Paper*, Natures Poem Designer Series Paper 
Ink: VersaMark, Daffodil Delight, Gray Granite
Accessories & Tools: Stitched Labels Framelits, Heat Tool, White Emboss Powder, Stitched Shapes Framelits, White Bakers Twine
Adhesives: SNAIL or double sided tape, Fine Tip Glue Pen, Stampin' Dimensionals (Mini)


Find more inspiration from me on
FACEBOOK  |  INSTAGRAM  |  PINTEREST  |  YOUTUBE


BLOG POST PLANNER, PAPERCRAFT EDITION
I put together a handy blog post planner, especially for paper-crafters! With this printable bundle, you can make sure that every blog post you write is brought together smoothly and is working hard to serve you and your audience well. Learn more *HERE*


Cards of All Shapes and Sizes, Let's Get Hopping Blog Hop

September 6, 2018


Every so often I change things up in class, moving away from greeting cards and giving participants a chance to try their hand at something different!  This month we made this Perpetual Calendar featuring the Share What You Love designer series papers.  Wanna peek inside? Of course you do!


Using patterned papers as a base for the calendar meant each page had a different look, even though two months share a panel (one front, one back).


We cycled through a series of embellishments for each page, some stamped and some fussy cut from the pretty papers themselves!


Despite being a very advanced project, the two new-to-class participants that joined the session for the first time did awesomely!


For a full look through this project, as well as a tutorial for putting one together yourself at home, see my YouTube video *HERE*


Many participants mentioned they would love to make more as gifts for friends and family!  So I thought it would be fun to share with them an idea for a matching gift card.  This project was inspired by the amazingly talented Jenni Pauli. 


Could this little notecard be any more perfect for giving purpose to all those scrap pieces of patterned paper created in the making of a project such as this???

See how quick this is to put together for yourself *HERE*

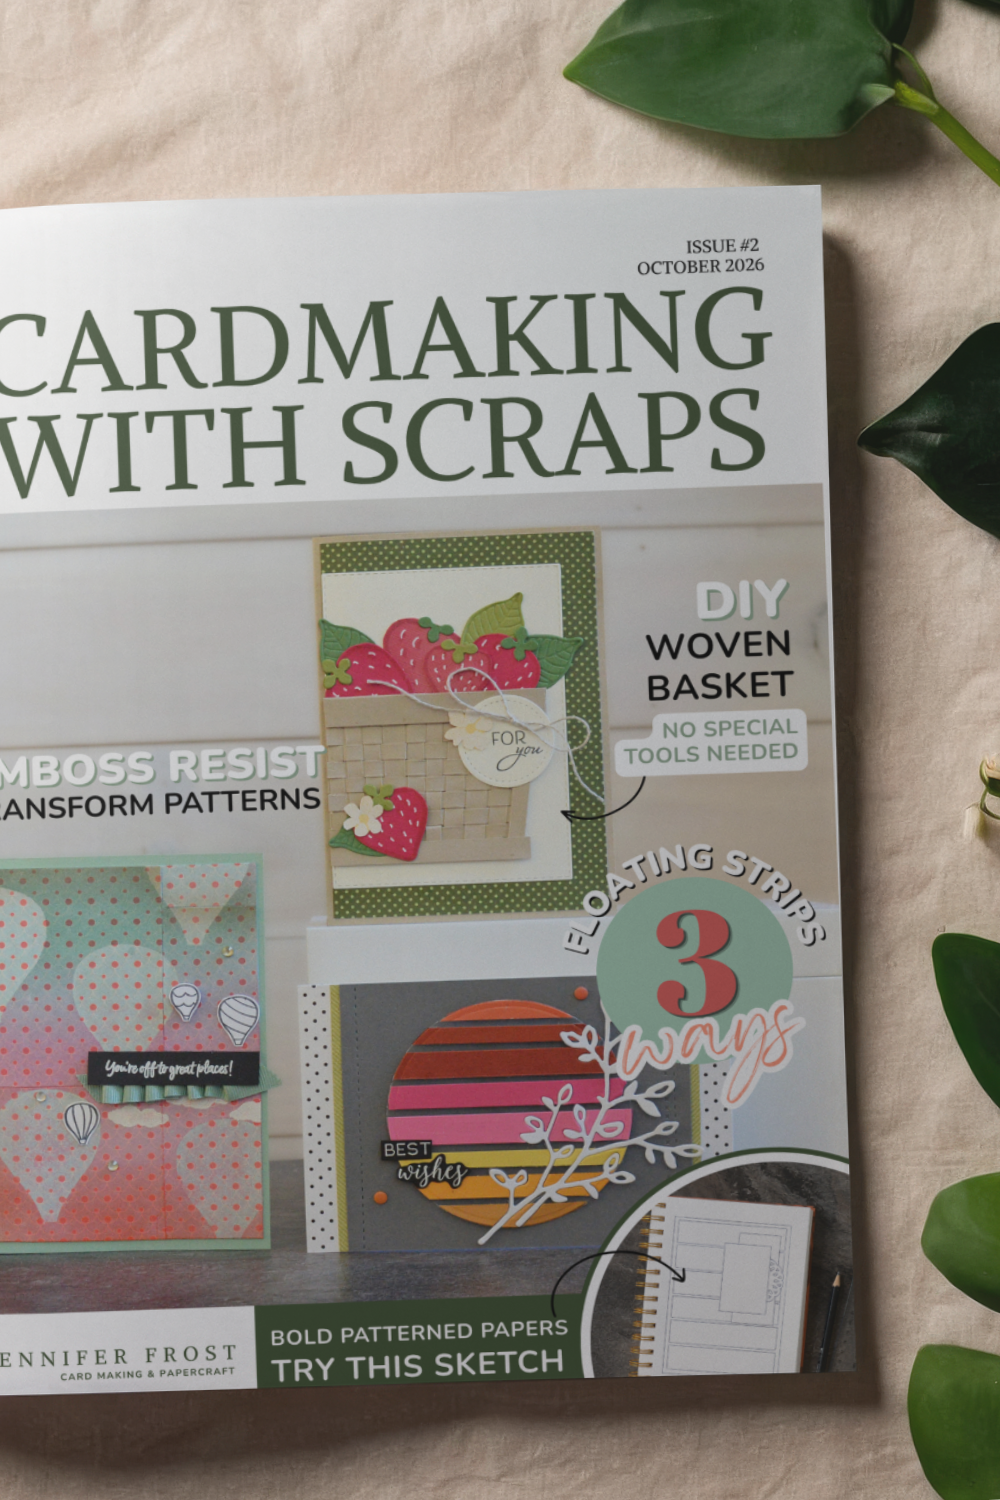
Cardmaking with Scraps

If you enjoy this kind of scrap-based cardmaking, I’ve also put together a Cardmaking with Scraps printable guide.

It includes 8 scrap-friendly card projects with measurements, photos and step-by-step “recipes” you can keep beside your desk for inspiration when you’re working through your stash.

👉 Learn more HERE

Happy crafting,

Jenn

[PRINTABLE] Share What you Love Perpetual Calendar

June 6, 2018


One of my goals for 2018 was to get better at sending cards to friends and family on time!  I want my loved ones to receive their birthday happy mail before their big day.  I've created this perpetual birthday calendar to get more organised and keep all the dates safely in one place to help achieve this goal.


This project features the Picture Perfect Birthday Stamp Set.  I just LOVE this set and think it's an absolute MUST HAVE from the current occasions catalogue.  The imagery is so versatile, perfect for all genders and ages.  The mixed font sentiments are super stylish!  It's quickly becoming a favourite for this stamper!!


The coordinating Picture Perfect Designer Series Paper pack has a mix of colourful patterns and photo papers.  I've featured each of these bright, playful papers for my inside pages.


I hope you've enjoyed this project!  Want to make a calendar like this one too?  See the bottom of this post for details on how you can get a digital copy of the calendar pages I custom made for this project!

Don't forget to follow the hop to see what my fellow Artisan friends have been making with these Picture Perfect Birthday goodies!  Next in the line up is with the fabulous Jessica Winter!


If you live in Australia I would love to be your Demonstrator.  You can find the following supplies used at my online Stampin' Up! store *HERE*.

Supplies Used:
Stamps:  Picture Perfect Birthday
Card: Whisper White, Bermuda Bay, Picture Perfect Party Designer Series Paper, Vellum
Ink: Bermuda Bay, VersaMark, Pool Party, Peekaboo Peach, Lemon Lime Twist, Berry Burst, Daffodil Delight, Flirty Flamingo, 
Accessories & Tools: Big Shot, Metallic Foil Doilies, Stitched Shapes Framelits, Heat Tool, White Emboss Powder, Paper Piercing Tool, Silver Thread, Mini Sequin Trim Silver, Silver Emboss Powder,
Adhesives: SNAIL or double sided tape, Stampin' Dimensionals, Tear 'n' Tape Adhesive, Fine Tip Glue Pen.

BUILD YOUR OWN PERPETUAL CALENDAR
I custom designed the calendar sheets for this project.  Would you like a copy to build your own calendar?  Get the digital file today at my Printable for Papercrafters page *HERE*

Includes 3 page pdf (4 months to a page) 
in both A4 and Letter format, ready for you to print 
and decorate your own style! 

[PRINTABLE] Perpetual Birthday Calendar

March 16, 2018

Blog Archive