Showing posts with label BY STAMP: Rooted In Nature. Show all posts

Last week our family was a little under the weather, so creativity felt a bit harder to come by. At times like that, I find it helps to simply play without expectations, and that's exactly how these backgrounds began.  

Would you believe that this background started as nothing more than a blank piece of Very Vanilla cardstock?

I really enjoy creating my own patterned paper. For this project, I was inspired by autumn tones, but wanted to give them a fresh twist by letting warm purples take centre stage, with rust and soft mint greens as the accents.

I enjoyed the first background so much that I couldn't resist creating a bonus variation, this time building it over a patterned paper scrap base. This retired Petals and Paisley's paper inspired my colour palette. It's always fun to see how a small change can create a completely different look.

These friendship cards were inspired by several current cardmaking challenges. The Simon Says Stamp Monday Challenge encouraged me to incorporate text into my background, which is one of my favourite ways to add subtle layers of interest. The All About Craft Challenge is celebrating friendship, so I chose sentiments featuring the word "friend," while the Festive Friday National Friendship Day challenge inspired the finishing touches—a knotted gold bow, tone-on-tone stamped leaves, and delicate little floral details added to the background to bring everything together.

I'd love to know—which of the two cards is your favourite?

Craft Along With Me

If you'd like to make these cards along with me, I've filmed a bonus craft-along tutorial that will be shared as my August subscriber freebie.

If you'd like to join my crafty community and receive the tutorial, simply add your email address in the sign-up box in the sidebar. I'll send the August freebie directly to your inbox when it's released.

It's my little way of saying thank you for being part of my crafty community, and I hope it inspires you to create your own custom backgrounds in colours you love.

Thank you so much for stopping by!

Jenn x

Thin patterned paper strips are often the scraps we keep “just in case”, but they can feel tricky to turn into something that actually looks intentional.
In this project, I’m sharing how I used a simple colour challenge and a stash of scrap papers to turn those thin strips into a finished card front that feels clean, layered, and polished.

Starting Point: A Colour Challenge and a Scrap Pile

This card began with the AAA Cards Challenge, which provided a colour palette to work with. I dug through my scrap stash and drew coordinating paper scraps, cutting them into thin strips ready for building the design. 

Why Thin Strips Can Be Tricky in Card Making

Thin strips of patterned paper can easily look messy if they’re not balanced well. The AAA Cards Challenge is all about Clean and Simple designs so my goals for this layout were to:

  • Make the design feel intentional rather than random
  • Prevent colours and patterns from blending together
  • Keep alignment clean and visually structured

To solve this, I used a simple layering trick that instantly lifts the design.

The Simple Layering Trick That Changes Everything

Instead of placing patterned strips directly onto the card base, I added a narrow strip of white cardstock behind each one. This small change separates each colour and pattern, adds visual breathing space and makes the whole layout feel more polished.

Stepping Up the Design with Die-Cut Flowers

Once the base card was assembled, I chose to add an extra layer of detail using tiny die-cut flowers cut from both white and matching coloured scrap pieces. This combination created a soft floral spray that ties the whole colour palette together, while still keeps the overall clean and simple feel.

Watch the Video Tutorial

If you’d like to see exactly how this came together, you can watch the full video here:

Clean and Simple vs Stepped-Up Version

I also created a simpler version of this design using leftover pieces from my desk. This version skips some of the layering and keeps things more minimal, using just the essential elements. Both approaches work well:

  • Clean and simple version – quick, minimal, and easy to recreate
  • Stepped-up version – more layered, textured, and detailed

This shows how one basic layout can be adapted depending on how much time or detail you want to add.

Using a Repeatable Layout (From My Scrap Guide)

The layout used in this card comes from my printable companion guide, which was developed during my earlier scrap-focused card series. Once you have a structure like this, it becomes much easier to adapt colours, themes, and challenges without starting from scratch each time.


I’m playing along with this week's Sunday Stamps colour challenge and couldn’t resist pulling together some scraps to see what I could create.

Cardmaking Inspiration from Colour Challenges

In the Sunday Stamps palette, the colours sit separated by white space, which inspired me to add thin white strips between each of the patterned papers.

I love how that small detail helps each colour stand out and changes the overall feel of the card.

Step It Up with Die-Cut Floral Details

The PaperFunday April Challenge is "anything goes" with optional die cut twist, so I was inspired to add a soft spray of die-cut flowers across the design. 

I also swapped out the faux stitched detail I used in the past (see here) for a touch of twine instead. It adds a lovely touch of texture without overwhelming the card.

I really love how this one came together. It still feels “scrappy,” but a little more refined and intentional.

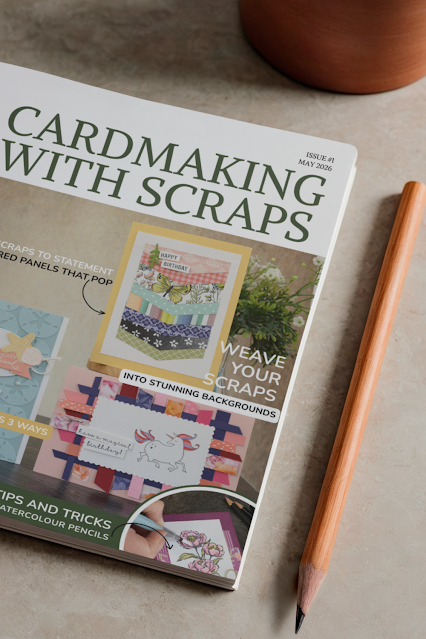
Cardmaking with Scraps: A Simple Creative Approach

This is one of the ways I’ve been exploring how to turn simple scraps into finished designs using a few repeatable ideas. There’s something really enjoyable about working within those kinds of gentle constraints and seeing how different each result can be.

If you enjoy working with your scraps like this, I’ve put together a printable guide with similar creative challenges you can explore in your own stash. 

Want More Scrap Card Ideas?

I’ll also be sharing another variation of this idea using a different colour palette over on YouTube later this week, so I’m curious to see how that one compares.


Turning Thin Scraps into a Striking Card

April 29, 2026

Today I’m sharing a vintage-inspired layered card, created entirely from paper scraps and elements I had on hand.

Stamping your own DIY Vintage Background

I started with a card-front sized scrap of patterned paper from my stash—the very last piece I had from an older set—which already had a soft, slightly distressed feel. From there, I built it up with additional stamping using black ink and some stamping-off techniques to create more depth and variation. The postmark details add that nostalgic, stationery-inspired feel.

No Line Watercolouring

One of my favourite parts of this card is the floral feature. Originally, I planned to stamp it in black, but I ended up using a no-line watercolouring technique instead, and I’m so glad I did. It was a bit of a happy accident that turned into something really soft and delicate, and it ties beautifully into the overall vintage look.

Scrap Layer Embellishments

I created a scrappy, notepaper-style layer in the background using a vanilla cardstock offcut. I paired this with patterned paper scraps from my desk to add a little colour and interest, while the vellum leaves add a soft, subtle detail. There’s something really rewarding about turning leftover scraps into something that feels intentional and cohesive.

Watch the Video Tutorial

I’ll be sharing a full video of this process on Friday, where I walk through the background building, layering, and watercolouring techniques in more detail. In that video, I’ll also be recreating this vintage-style background from scratch, so you can achieve a similar look even without the original base paper.

World Stationary Day

This card was inspired by the Festive Friday Challenge Blog #FF0207, celebrating World Stationery Day.

From their inspiration list, I incorporated sepia tones, twine, distressing, vellum, postmarks, and a “thinking of you” sentiment.

Thanks so much for stopping by—and if you’re playing along with the challenge, I’d love to see what you create!


Vintage Inspired Layered Card

April 21, 2026


I was introduced to the Rooted in Nature suite whilst at OnStage in April and it was love at first sight!  I snapped it up straight away and I'm so SO excited that the Crafty Carrot team are featuring this suite in class throughout September.

Our blog hop today is an excuse for us to warm up for the upcoming classes.  As with every month, participants will join four multi-Artisan award winners in weekly workshops held LIVE in our exclusive facebook group.  Next month, however, participants will get a BONUS class hosted by guest designer Holly Stene!  I've been a huge fan of Holly's for simply AGES and really look forward to her class.


For my project today, I couldn't say no to the chance to document this little memory.  My parent's used to own acres of property in the bush.  We always loved visiting there.  The bush setting and memories of making a log pile maze were just such a great fit for the Rooted in Nature imagery.


Of course, the little tag embellishments I've created would make super fun gift tags or card embellishments too, don't you think?

This is certainly a program you won't want to miss!  Secure your spot in class today!  Learn more by visiting our page here: http://craftycarrotcollective.blogspot.com/  

Need more tempting?  Hop along and see what teasers my friends have to share with you.  Next up is the lovely Krista Frattin!


Find me on
FACEBOOK  |  INSTAGRAM  |  PINTEREST  |  YOUTUBE

Follow the Crafty Carrot Co on
FACEBOOK |   INSTAGRAM  |   PINTEREST

Rooted in Nature, The Crafty Carrot Co

August 14, 2018

Blog Archive