Showing posts with label BY STAMP: Magical Day. Show all posts

After creating a bright and colourful sunburst card, I found myself wondering how the same technique might look with a softer colour palette, which led to today's tone on tone card featuring a playful paper pieced mermaid.

Bright Cardmaking Colour Palette

The jungle colour palette at As You See It Challenge features Coastal Cabana, a rich aqua blue. I decided to pair this bright tone with scraps of pool party to create a tone on tone sunburst. The result creates plenty of texture and visual interest while maintaining a calm, cohesive feel.

I love how a simple change in colour palette can completely transform a technique. The same sunburst background that felt bold and energetic in my previous project suddenly became elegant and serene. It's a wonderful reminder that colour choices play a huge role in shaping the mood of a handmade card.

Magical Day Mermaid

The layout for this project was inspired by a sketch challenge from Sunday Stamps. Once the background was complete, I began thinking about a focal image. Although I didn’t set out with a strict beach theme at the beginning, the colours and soft layered textures naturally steered the design in that direction, evoking calm seaside waters and coastal vibes. I wanted something playful, so I chose a mermaid image from my collection, which fits beautifully with the current Simon Says Stamp “At the Beach” challenge.

To colour the mermaid, I used a paper piecing technique, one of my favourite ways to use even the smallest paper scraps.

Watch the Video

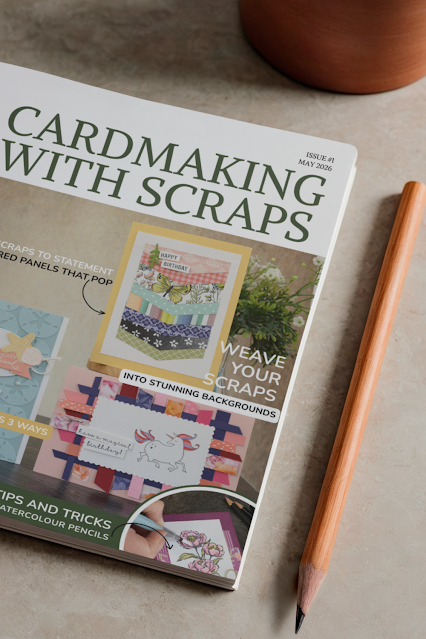
Cardmaking with Scraps

If you enjoy this kind of scrap-based cardmaking, I’ve also put together a Cardmaking with Scraps printable guide.

It includes 8 scrap-friendly card projects with measurements, photos and step-by-step “recipes” you can keep beside your desk for inspiration when you’re working through your stash.

👉 Learn more HERE

Happy crafting,

Jenn

Tone on Tone Sunburst Background with a Paper Pieced Mermaid

June 24, 2026

Paper weaving is a creative way to use paper scraps and turn them into textured card backgrounds. In this tutorial, I’m sharing how to create a woven paper design using leftover cardstock and patterned paper, along with two handmade card ideas using this technique.

paper weaving card made with scrap patterned paper and cardstock strip

Finding Inspiration for Paper Weaving

For this next challenge in my Use Your Stash – Paper Scraps Edition, I found myself revisiting a technique I’d played with years ago.

Back in early 2021, I shared a project with The Crafty Carrot Co where I wove uniform strips of soft blues, pinks, and white to create a simple, textured background. It was neat, controlled, and very much within my comfort zone.

paper weaving card made with scrap patterned paper and cardstock strip

Recently, while flipping through an old Stampin’ Up! magazine, I came across a woven sample that felt completely different — brighter, busier, and far more playful. The strips varied in size, the colours were bold and mixed, and the overall look felt like the perfect fit for a scraps challenge.

I’ll admit, I wasn’t entirely sure I could pull it off.

So before filming, I had a quiet play.

paper weaving card made with scrap patterned paper and cardstock strip

Choosing Colours from Your Scraps

I started with a single multi-coloured floral paper — filled with pinks, peaches, and soft oranges — and pulled in coordinating tone-on-tone patterns and cardstock scraps. I even added a deeper Concord Crush purple for contrast. Using the same approach I’ve leaned on throughout this series, I let that one piece guide the rest of my colour choices.

And to my surprise… I loved how it came together!

Designing Around a Busy Background

For the card design, I chose a scalloped rectangle from the Stitched So Sweetly dies to create a central panel. This allowed the woven background to frame the design without overwhelming it — adding texture and interest while still letting the focal point shine.

I reached for a unicorn stamp I hadn’t used before, which felt like a perfect nod to the “use your stash” theme. Keeping the colouring soft and minimal — mostly white, with subtle touches of colour in the mane and tail — helped balance the busier background beautifully.

Paper Weaving Card Variations

In the video tutorial, I share the full weaving process along with a second variation. While the colours, image, and orientation change, the formula stays the same: one multi-coloured paper to guide your palette, supported by coordinating scraps, and a lightly coloured focal image to bring it all together.

paper weaving card made with scrap patterned paper and cardstock strip

This time, I used a playful chicken from the Hey Birthday Chick stamp set — proof that this technique can be adapted to suit any style.

paper weaving card made with scrap patterned paper and cardstock strip

Watch the Full Tutorial

If you’d like to see the full process and how each version came together, you can watch the tutorial below.


Explore more scrap cardmaking ideas

If you enjoy stash-busting ideas like this, you can explore the rest of the Use Your Stash – Paper Scraps Edition series [here].

Make Woven Paper Backgrounds with Scraps | Use Your Stash #6

April 2, 2026


Today I'm sharing a video tutorial featuring a couple of techniques!

Join me and play along as I:
  • add a little colour and sparkle to texture paste to create this fun brick wall background, and
  • create a multi-toned sentiment using Stampin' Write markers applied directly to the stamp.  For more ideas on this classic technique, head on over to the TGIF challenge page this week!

    Don't forget to subscribe to my YouTube channel to catch all my latest tutorials.  And remember to leave a comment, I'd love to know if you enjoyed the project!


Supplies Used:
Stamps:  Magical Day
Card: Whisper White, Basic Gray, Smoky Slate, Real Red
Accessories & Tools: Basic Gray and Pumpkin Pie Stampin' Write Markers, Watercolour Pencils, Blender Pen, Texture Emboss Paste, Palette Knives, Smoky Slate Ink Refill,  Dazzling Diamonds Stampin' Glitter, Pattern Party Decorative Masks, Layering Circles Framelits, Big Shot, Stitched Shapes Framelits, Heat Tool, White Embossing Powder, Pumpkin Pie Ribbon (retired)
Adhesives: SNAIL or double sided tape, Foam Adhesive Strips, Stampin' Dimensionals  

Texture Embossing Paste, How to add Colour and Sparkle

March 25, 2018

Blog Archive